Failure to calibrate flowmeters can negatively impact performance, while calibrating too frequently can result in excessive costs without providing any benefits. So, the question is, how do you determine if calibration is needed and what the frequency should be?
In many process plants, flowmeters are calibrated annually or more frequently simply because that’s the way it was done in the past. New instruments and technologies, combined with careful planning and study, can allow plants to calibrate flowmeters at an optimum frequency, resulting in improved operations and cost savings.
A flowmeter that is not measuring properly can cause many problems. In a custody-transfer application involving crude oil or natural gas, even the smallest error can cost a customer millions of dollars a year. In a food processing plant, a similar error can adversely affect the quality and safety of food products, resulting in the costs that go along with such failures.
Because flow measurements are so critical to many processes, the industry standard is to calibrate annually, even though that might not be necessary. In many cases, this is done in an attempt to demonstrate to a quality auditor that instruments within the process are under control. For most companies, annual calibration is performed as a traditional ritual with no scientific basis behind it—other than it being the longest duration of time they are willing to risk before finding a potential problem.
In many instances, yearly calibrations are not necessary, as some flowmeters require calibration only once every three or four years depending on the process fluid, operation, and criticality. In other cases, a flowmeter may require calibration much more frequently, possibly on a monthly basis, to maintain a safe, efficient, or regulatory compliant operation. It’s also important to realize that calibration intervals are not always fixed, meaning that they might fluctuate based on usage or historical performance.
How do you determine when to calibrate a flowmeter? By setting up a calibration plan that follows best practices for flow calibration.
READ ALSO: A Solution for Separation Success—Interface Level Sensing for Water Dump Control in Oil & Gas Applications
The importance of instrument assessment
The first step in a calibration plan is to perform a plant-wide assessment of all your instrumentation, including flowmeters. To do this, you must first identify and make a list of all the equipment parts and all instrument-related systems. This list should also include details such as description, local information, working range and history, and any other points that provide a better understanding of the part’s function.
The first stage in analyzing this data is to identify which instruments are critical to the application, the environment, and operator safety. To start, the Head of Metrology (Quality) and Head of Maintenance—or similar professionals who have the most in-depth knowledge of the process and related instruments—should together determine their knowledge of the process environment, the condition of the installed instruments, the type of maintenance work carried out, and, finally, any limitations imposed by the plant in terms of servicing.
| 4 categories of critical importance
Instruments should be classified according to one of the four categories of critical importance below:
|
After this information is compiled, it is important to start from the finished product—and the tolerance permitted in relation to its quality—and go back through the various stages in the production process. At each stage it is important to assess each instrument and flowmeter in place and ask, "Does this instrument have an impact on the quality of the product (or intermediary product) on process functioning, or operator safety?" The total installed base will determine how frequently to calibrate flowmeters. The next step will be to then set up a calibration plan depending upon these factors.
The flowmeter manufacturer may also work with the Head of Metrology (Quality) and Head of Maintenance to determine all the factors to bear in mind when defining which measuring points to include and assess the plant’s installed base. They can also help define the right calibration plan based upon your frequency needs.
Prioritize your flowmeters
After an installed base audit has been performed, it is important to categorize all flowmeters by critical importance. Flowmeters fall into one of four categories, ranging from critical to noncritical importance.
The first category — flowmeters critical for the product — are those that affect product quality. We start here, because these flowmeters have a direct link to company profits, whether it involves measurement of ingredients in food processing, mixing of chemicals, or custody-transfer applications.
The next category — flowmeters critical to the process — are those that can upset the overall plant or other processes (shutting down the entire process) and thus cause inefficiencies and production losses, but have no direct effect on product quality or safety.
Flowmeters critical for safety have a direct impact on operator safety, equipment protection, and/or the environment. These flowmeters do not necessarily have to be extremely accurate, but they certainly have to work properly and reliably.
Finally, noncritical flowmeters have no impact on product quality, the overall process, safety, or the environment.
After all flowmeters have been identified and classified into these four categories, a Maximum Permissible Error (MPE) is assigned to each device. MPEs define the tolerance for each function being measured. A critical flowmeter will usually have a more stringent MPE than a noncritical flowmeter.
If you can show an auditor or other responsible entity that a non-critical flowmeter has no effect on product quality, safety, or the environment, and its MPE is higher, then you can claim there is little or no need for periodic calibration. Conversely, critical flowmeters may need to be calibrated more often than annually to maintain critical product quality, process operation, or safety.
Asset management software
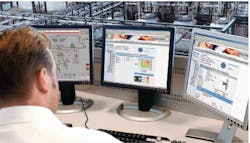
Flowmeter data from the audit should be stored in an asset management, maintenance management, or instrumentation management program. One of the major advances in recent years has been the development of instrumentation management software. These systems provide information such as spare parts lists, drawings specific to the flowmeter, and original calibration data and certificates (Figure 1).
All flowmeters are calibrated by each manufacturer prior to delivery to the customer, and the calibration data is easily entered into asset management software. Afterward, when a flowmeter is recalibrated, the device’s calibration history is updated and can potentially be automatically loaded via an electronic calibrator connected to the asset management system.
Another recent advance allows access to the information in an asset management system by mobile devices used by maintenance personnel (Figure 2). From the field, a technician can call up the calibration history, diagnostic data, troubleshooting instructions, and other information needed to properly diagnose a flowmeter problem.
Diagnostic data from each flowmeter can be read by the automation system and/or by the asset management system. For example, diagnostic data for a Coriolis flowmeter includes empty pipe detection, sensor drift, sensor error, electronics error, inhomogeneous mixture error, ambient and process temperature errors, and other information. This data can be used to optimize calibration, to diagnose problems, and to detect minor issues before they grow into substantial problems.
All flowmeter vendors provide this kind of information in real time, typically via fieldbuses such as Profibus PA, Foundation Fieldbus, or EtherNet/IP. Depending on the fieldbus, flowmeters can also provide diagnostic data directly to technicians in the field. EtherNet/IP, for example, lets devices be polled by a condition monitoring or automation system to determine if there are any diagnostic messages that need to be sent to maintenance personnel as an alert.
An industrial PC equipped with asset management, maintenance, condition monitoring, or HMI/SCADA software can access all the real-time data and diagnostic information it needs directly from the devices.
In many cases, modern flowmeters equipped with advanced diagnostics can determine if a problem exists, and condition monitoring or other software can inform the maintenance department via an alarm that a particular flowmeter may be having problems.
Deciding when to calibrate
Setting up a flow calibration plan for individual instruments often requires assistance from the flowmeter manufacturer and a qualified calibration company with industry experience, as they are best qualified to advise on how often a flowmeter should be calibrated in a typical installation. The end-user must then use this advice and apply it based on particular service conditions, functions of the meter, and their experience.
Calibration frequency depends on the Criticality and MPE, as well as the nature of the product being measured, the continuity of the process (continuous use or intermittent use), the need for clean-in-place (CIP) operations, the severity of process impacts, the type of flowmeter (contact or non-contact), and how easy it is to access and remove the flowmeter for calibration.
In some cases, it may only be possible to access a flowmeter during a complete process shutdown; in other cases, a flowmeter might be completely accessible for calibration.
In a new plant, setting the flowmeter calibration frequency is usually based on expected operational parameters and advice from the flowmeter manufacturer and qualified calibration team. But in an existing plant, the frequency of calibration can be based on actual historical experience and previous documented calibration performance with the flowmeters and processes that yield better results. It’s important to note that in either case, quality, regulatory, or safety requirements may dictate a specific calibration interval regardless of the advice from the flowmeter manufacturer or historical data from previous calibrations.
Once a calibration plan has been in effect for a few years, the instrument management software takes on a bigger role. When a calibration is done on a flowmeter, new data is recorded and stored in the data base. This data shows the status of the flowmeter before and after calibration, and it may very well indicate that the flowmeter does not require calibration as often as expected.
Where to calibrate?
Depending on the application and the standards involved, flowmeters can require calibration, proving, and/or verification. For calibration, flowmeters are removed from the process and shipped to a calibration facility (Figure 3).
Paraphrasing the formal definition defined by the International Vocabulary of Metrology (VIM), calibration is the procedure to establish a relationship between the quantity value given by the flowmeter (i.e., mass flowrate for the unit under test), and the reference quantity value obtained by a calibration reference (e.g., rig), with its associated measurement uncertainty.
Accredited calibration labs must meet the requirements of ISO/IEC 17025 (An International Standard that defines the quality and technical requirements for calibration laboratories) to ensure traceability to the governing National Metrology Institute (e.g., NIST). Accreditation of a calibration laboratory’s proficiency is performed by third-party accrediting bodies like the American Association for Laboratory Accreditation (A2LA), or through the National Voluntary Laboratory Accreditation Program (NVLAP). Laboratories that have achieved ISO/IEC 17025 A2LA accreditation have published defined Scopes of Accreditation, which illustrates their range of calibration capability.
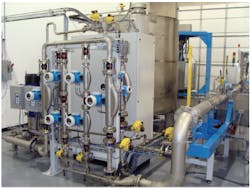
Calibration can also be done at the user site using a portable flow rig (Figures 4 & 5). A portable rig does not provide the same accuracy as a calibration lab, but it can calibrate instruments to within +/-0.25 percent or better, depending on the specifics of the flowmeter under calibration.
Portable flow calibration rigs offer convenience and speed. Depending on plant topology, many measuring points can be quickly calibrated with minimal interruption to a process. This helps to minimize downtime or shutdown of the process, especially when fast turnaround and keeping production up and running is most crucial.
Calibration labs typically handle larger size flowmeters with larger flowrates. Portable flow rigs can handle flowmeters up to a maximum of 2" (rig), but larger sizes can be calibrated in-line with master meters. Accuracy is comparable, but the results are still traceable to recognized national standards and the turnaround time is reduced to hours versus days or weeks. For example, Endress+Hauser’s on-site flow calibration is accredited in accordance with ISO/IEC 17025.
How to choose between lab & on-site calibration
The following summary of laboratory and on-site calibrations is designed to help end-users identify the appropriate option for different meter types:
Laboratory calibration:
- Best accuracy
- Days to weeks turnaround
- Larger calibration range—1/24" to 12" and larger
- Usually higher cost than on-site
On-site calibration:
- Good accuracy
- Fastest turnaround (hours)
- 2" and smaller on rig—3" to 4" in-line
- Usually lower cost than laboratory
Flow proving
Portable calibrations can also include flow proving. Flow proving is typically performed by the oil & gas industry on devices used for hydrocarbon custody transfer. In proving, a transfer standard is installed in-line with the flowmeter under test on process fluid under process conditions. Specific requirements for test methods and for documented results are required in the oil & gas industry. Transfer standards can be master meters, piston, small volume, ball, or bi-directional provers. During proving, the flowmeter under test is compared to the transfer standard and an external meter factor is determined, based on the unit under test repeatability. Proving differs from calibration in that it’s typically in-situ testing under process conditions.
Verification
It is important to distinguish that unlike calibration, verification aims to provide evidence that a flowmeter fulfills certain technical requirements of functionality as defined by the manufacturer. It is usually a very detailed functional test to confirm sensor and/or transmitter stability and produces a qualitative outcome. Electronic verification consists of the flowmeter and a verification system (Figure 6).
A verification system acquires a number of flowmeter parameters related to the flowmeter response. These values are evaluated by a dedicated algorithm in the verification system and the system parameter reference values. The result will deliver the current status of flowmeter functionality. The final outcome is a qualitative assessment report based on a pass-fail criterion such as process impacts, drift, or hardware failures. The concept of verification must define the long-term stability of the test system, the stability of internal references, and metrological traceable factory references for user confidence. In many cases, verification can be performed on less critical meters or as a means to extend the calibration frequency.
A clamp-on ultrasonic flowmeter can be used to check a flowmeter’s operation (Figure 6). While a clamp-on ultrasonic flowmeter typically has only 2–5 percent accuracy, comparing the ultrasonic flow measurement to that of the installed flowmeter can provide some level of confidence that the meter being tested is operating properly. Such a test is often performed in concert with verification on very large flowmeters in water and wastewater applications, or on other flowmeters that are difficult to remove for full calibration testing.
Thanks to advances in flowmeter diagnostics and instrument management software, the increasing availability of nearby calibration labs and portable calibration rigs—and the willingness of instrument vendors to help users with calibration—setting up a flow calibration plan based on best practices is much easier than in the past.
Once set up, the flow calibration plan will improve operations and save money by making sure all flowmeters are calibrated only when necessary.
For instance, a food and beverage plant in Wisconsin was having difficulty with compliance and had recently failed an audit. With the time and resources they had to dedicate, they realized they needed support. Working with the flowmeter manufacturer, who had the knowhow and specialized in flow calibration, they first began by performing an assessment of all 300 flowmeters. After the assessment, the calibration plan was set up. Based on criticality levels, the MPE and frequencies were determined. After performing the calibration on all devices, all flowmeter data was stored in a calibration management software solution. Now the plant is able to easily access flowmeter performance information, including calibration data and certificates. Solutions of this sort can help optimize the flowmeter calibration process, ensuring meters are only calibrated when it’s actually necessary.
Ben Keizers is the product business manager for Services at Endress+Hauser USA. Before moving to the U.S. from his previous home in the Netherlands, Mr. Keizers held various positions such as VP of sales and marketing for a manufacturing company and sales engineer at Honeywell Amsterdam. Mr. Keizers holds a bachelor’s degree in Electrical Power and Automation, as well as a bachelor’s degree in business engineering. He can be reached at [email protected] or 317 535-1384.
Kyle Shipps is the calibration manager for Endress+Hauser USA and has been working in the Service Department for 13 years. He has held previous positions as a Flow Product Specialist and in Technical Support. Mr. Shipps has a bachelor’s degree in Software Engineering and associate’s degree in Electronic Technology. He can be reached at 317 535-2185.


