How to eliminate process clamp failure in pharma and biopharm applications
Why is the proper handling of process equipment clamp connections so important? Quite simply, if clamp connections are not correctly installed and maintained, they will not seal as designed. And correct inspection and maintenance procedures are equally important to avoiding problems caused by ineffective clamp connections, including product contamination, leakage, and costly downtime. Here, we’ll outline the proper methods for clamp connection inspection, installation, and maintenance and discuss why they’re vital to your process equipment operations.
Clean, safe process clamp connections
In the pharmaceutical and biotech world, the hands-on activity of disassembling, cleaning and reconfiguring clamp connections is extremely important. Clamp connections are designed to seal two ferrules together quickly, securely and without creating sites where contamination can collect. An improper connection can harbor bacteria. What’s more, it may cause a leak. If a process fluid can get out, then there’s a chance that contaminants can get in and an entire batch could potentially be scrapped. Even a single drip of a process material can be extremely costly.
READ ALSO: Life Science Industry to Spend $3.4B on Valves In 2015
Most important however, is your safety. As you know, pressure, temperature and caustic process materials are all potential workplace hazards. Improper handling practices can be costly and unsafe. When it comes to process equipment, maintenance and training are critical to ensuring reliability and safety. The first step in proper training is familiarizing yourself with the different types of clamp components in your work environment.
A variety of process clamp connection types
There are many clamp types in use today in a wide variety of applications. Often these clamps are made of 304-grade or 316-grade stainless steel. Be aware that your plant may require specific clamps for certain applications. Different clamp types include:
- Single pin
- Double pin
- High pressure
- ASME
- Safety
- Lock out
- Instrument
- 3 segment clamps
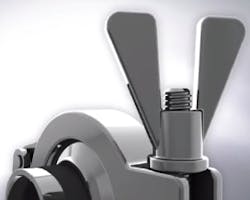
In addition to these clamp styles, there are also two different types of fasteners: wing nuts and hex nuts. Regardless of the type, all styles of sanitary clamps work in essentially the same way:
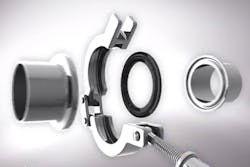
- The clamps attach to ferrules. (Bear in mind that Bio Processing Equipment (or BPE) standards were created to give industry the ability to fabricate ferrules that can be connected to ferrules from any other manufacturer.)
- Between the ferrules is a gasket. Gaskets are made of different materials, which will vary depending on the needs of the application. Commonly used gaskets are EPDM, Silicone, Gylon, Viton, and Teflon.
- There are many clamp and fastener options available. Remember to check for ferrule differences between manufacturers and to make sure you select the proper gasket material.
Process clamp connection inspection tips
Before you install a clamp, you must perform a close inspection. There are three main components to a clamp connection: the ferrules, the gasket between the ferrules, and the clamp itself. The inspection tips and principles shared here are intended to apply to all styles of sanitary clamps.
First, inspect the ferrules:
- Check the alignment of the ferrules. The alignment of the ferrules is critical. The clamp cannot be used to pull pipes and components into alignment.
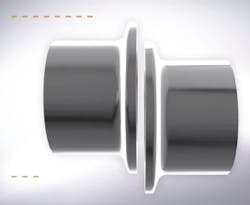
- Check the gap between the ferrule faces. Ideally, to minimize pipe stress, you should start with a gap that is the same width as the gasket.
- Check the surface of the ferrules for imperfections. Defects such as a gouge or scratch can create a leak pathway; even a tiny scratch can be an area where bacteria can grow.
- Examine the ferrules for residue. Residue from a previous gasket should be carefully removed to provide a smooth, flat surface. If there’s residue, the gasket will not seat properly. (Please refer to your supervisor for the proper method of ferrule cleaning for your application.) And whatever you do, please do not use a screwdriver or other sharp tool to separate components such as an endcap, or to remove residue, because you will scratch the metal.
Next, let’s talk about gasket inspection. You should always inspect a gasket before installation. All gaskets should be visually inspected for discoloration, cracks, and imperfections such as gouges, tears, or product buildup on the surface of the gasket. Gaskets can become brittle with use and age. An elastomeric gasket should spring back when you bend it. An elastomeric gasket also should not crack when you try to bend it. Using an imperfect or expired gasket can create voids and intrusions where material can collect and bacteria can grow.
Next in your inspection you should look for these common clamp defects: deformations and bent components, loose hinges, damaged threads, and any indentations caused by uneven compression. Any and all of these factors can lead to inconsistent or incomplete compression.
Process clamp connection installation
After the clamp passes your inspection, you’re ready for installation.
- Position the gasket between the ferrule flanges.
- Align the bead of the gasket with the grooves of both flange faces.
- Mate the faces together and then apply the clamp.
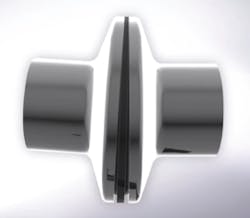
Make sure both flanges are within the clamp groove. When you tighten the clamp, it squeezes on the flanges pushing the ferrules toward each other. This creates a proper seal. The clamp connection should perfectly align the two ferrules, providing uniform crush to the gasket.
In a proper installation, the gasket is slightly compressed and the bead is centered in the ferrule groove. The gasket’s inside diameter should be aligned with the pipe’s inside diameter so there’s no intrusion or void. The alignment here is critical; it must be precise and even on all sides. Any irregularities will result in inconsistent or incomplete compression. Sometimes the ferrules are not perfectly aligned. If they meet at an angle, then one side of the gasket will be over-compressed and the other side will have gaps that can trap bacteria or process material. The misalignment must be corrected before you attempt a connection.
Pipe alignment has very tight tolerances. Being off by even the slightest angle can be problematic. The maximum allowable misalignment is only 2 to 3 degrees. When a clamp is tightened, the ferrules draw together very slightly. On a BPE ferrule, a secure seal compresses the gasket only 0.3mm.
Undertightening versus overtightenting process clamp connections
Finish installation by tightening the clamp. Under-tightening the clamp will leave gaps between the ferrule and the gasket. Even if the connection doesn’t drip, the gaps may trap material where clean-in-place processes cannot reach. That’s where bacteria could collect.
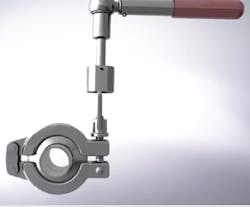
On the other hand, over tightening the clamp will over-compress the gasket and cause it to protrude into the pipeline. As you may have guessed, the intrusion will also create a foothold for buildup and bacteria. In order to get the proper degree of tightness, either hand-tighten or use an approved torque tool. Always tighten to the appropriate torque spec. To use a torque tool, simply slip it over the fastener and tighten until the tool begins to slip. Once the limit has been reached, the tool will not allow you to over-tighten the clamp.
The clamp jaws should never touch after tightening. If the jaws touch, there may not be enough compression on the gasket to create a proper seal. This could be caused by a deformed or damaged clamp, over-tightening, or using the wrong size clamp for the ferrule assembly.
Last but not least: Process clamp connection maintenance
Inspect clamps regularly to ensure clamps remain at their installed torque setting. In particular, it is very important to monitor high-pressure steam lines for changes in torque. Due to thermal cycling, the compression on the gasket will vary. Also, gaskets can lose elasticity, or they can cold flow, with age. These factors can degrade the quality of the connection and cause leaks. You can avoid this by performing maintenance on an adequate schedule, replacing gaskets as necessary and checking for clamps loosened by vibration.
With an eye to installing, inspecting and maintaining clamp connections properly, you can effectively and safely work with whatever variety of clamp connections you use in your process equipment operations.
Eric Van Steenlandt is chief operating officer of L.J. Star Inc., a leading supplier of sight glasses and sight flow indicators for the pharmaceutical and chemical industries. He may be reached at [email protected].
